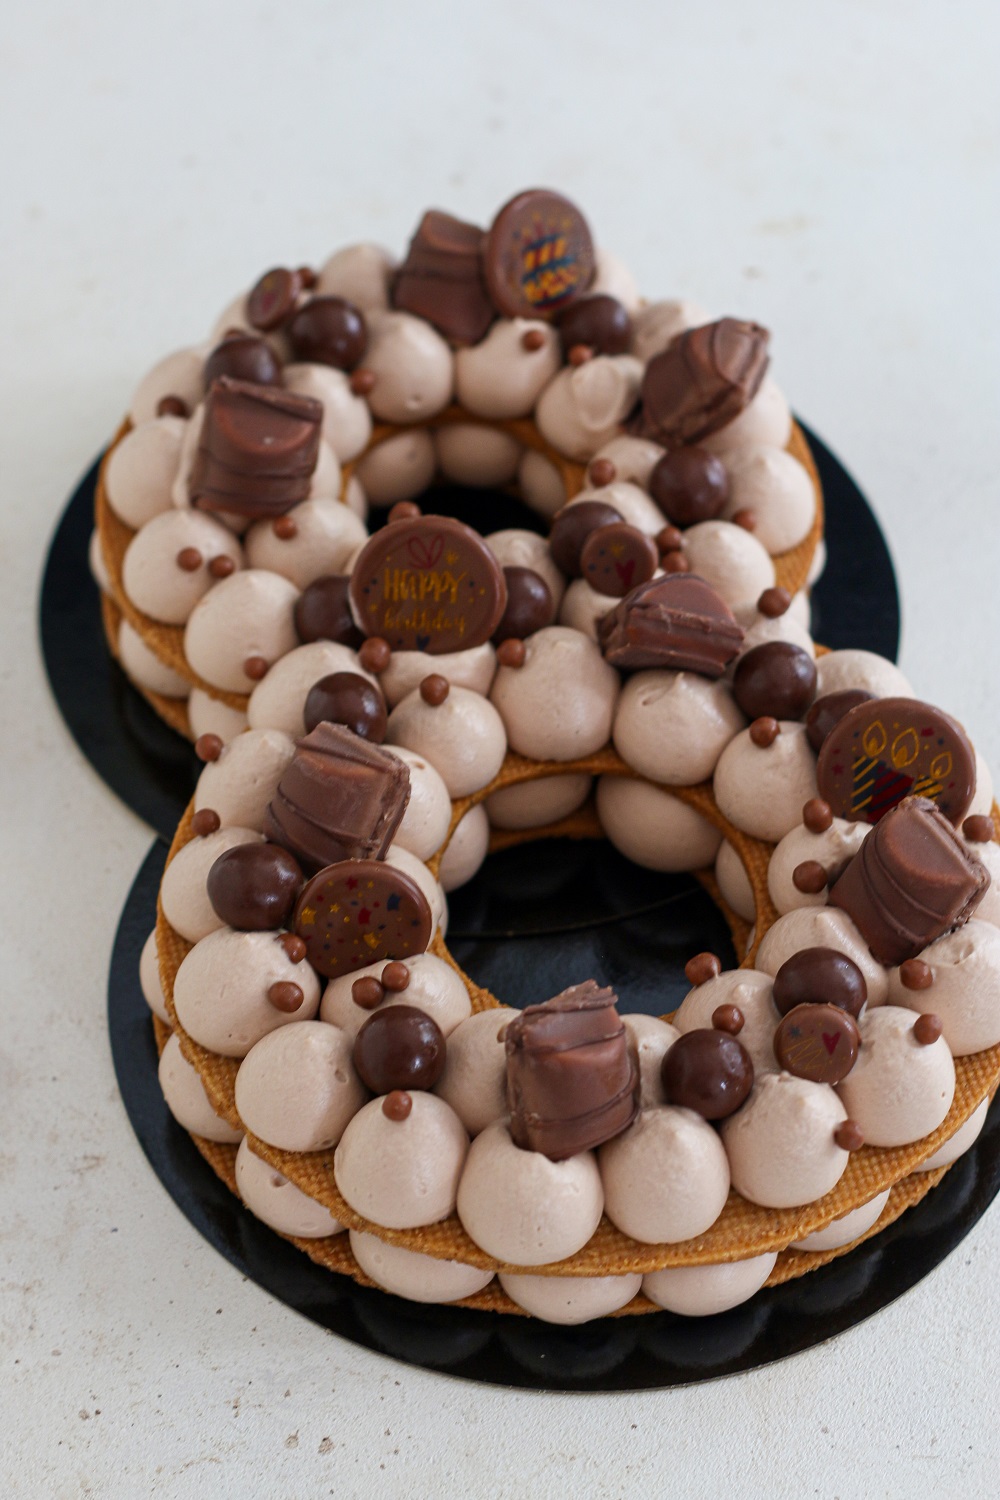
If you’re looking for a fairly simple cake to make for a birthday, I recommend the “number cake”. I don’t think it needs any introduction anymore; it’s all the rage online. This milk chocolate and hazelnut praline number cake is made up of two layers of hazelnut pâte sucrée, a milk chocolate whipped ganache, a hazelnut praline and a whole heap of chocolate treats.
It’s a fairly simple recipe to make, which can be spread over several days to lighten the workload. In my previous article on the vanilla and red berry number cake, you’ll find tips and advice for making a cracking number cake!
How does cutting go with pâte sucrée?
It’s one of the questions that comes up most often on Instagram. Rest assured, cutting goes very well, but it’s quite funny because the first number cake I made a few years ago (the chocolate and gianduja number cake) was made not with pâte sucrée but with a hazelnut sponge precisely because I, too, was worried that cutting would be difficult.
For cutting to go smoothly, the number cake must be assembled 12 to 24h before serving. The pâte sucrée, which I nevertheless waterproofed with cocoa butter, will very slightly “soften” on contact with the whipped ganache. Soften may not be the right word (it’s not soft either), but it allows for a clean cut, without crushing the whipped ganache.
Ingredients & method
5 components · Full recipe
Milk chocolate whipped ganache (start the day before)
Ingredients
- 150 g (5.3 oz) Jivara 40% Valrhona milk chocolate
- 125 g (4.4 oz) heavy cream
- 250 g (8.8 oz) heavy cream, very cold
- 2 g (0.1 oz) powdered gelatine (= 1 sheet)
- 12 g (0.4 oz) water (to rehydrate the gelatine)
Method
1
Rehydrate the gelatine in the water.
2
Melt the milk chocolate gently in a bain-marie or in the microwave.
3
Heat the 125 g (4.4 oz) of cream and bring to a gentle boil.
4
Off the heat, add the rehydrated gelatine and stir.
5
Pour one third of the cream over the chocolate and mix with a spatula to create an emulsion. Then add a second third, then a third, until you get a smooth, homogeneous mixture.
6
Add the 250 g (8.8 oz) of cold cream and mix again. Blend for a few seconds with a hand blender to fully emulsify.
7
Cover with cling film touching the surface and refrigerate overnight.
Hazelnut praline (can be made in advance)
Ingredients
- 180 g (6.3 oz) whole toasted hazelnuts
- 120 g (4.2 oz) sugar
- 1 pinch of fleur de sel
Method
1
If you’re not using pre-toasted hazelnuts, you’ll need to toast them first. Simply place the hazelnuts in the oven for about 15 minutes at 150°C / 300°F. Once lukewarm or cool, rub them between your hands to remove the skins (if a little remains, that’s fine).
2
Spread the hazelnuts on a sheet of baking paper and set aside.
3
Make a dry caramel by adding the sugar gradually to the saucepan so it melts evenly. Hold the pan handle firmly and swirl the caramel around without ever stirring it.
4
When the caramel is golden, remove from the heat and pour over the hazelnuts. Leave to cool completely.
5
Once everything is completely cold, break the praline slab and place it in a food processor with the fleur de sel. Process until you get a smooth praline, then store in an airtight jar. A dry caramel needs constant swirling, as it is less homogeneous than a sugar-water caramel. On the other hand, it burns less quickly. The golden rule for making caramel: never use any utensil to stir it! Gripping the pan firmly by the handle, swirl it continuously, back and forth, in every direction. (source: l’Académie du goût)
Hazelnut sweet pastry dough (start 2 days ahead or the day before)
Ingredients
- 150 g (5.3 oz) butter
- 95 g (3.4 oz) icing sugar
- 30 g (1.1 oz) Pariani toasted hazelnut powder
- 60 g (2.1 oz) egg (one large egg)
- 250 g (8.8 oz) flour
- a pinch of fleur de sel
Method
1
Place the softened butter and icing sugar in the bowl of a stand mixer fitted with the paddle attachment and mix on low speed. Add the hazelnut powder and fleur de sel and mix again.
2
Add the beaten egg and mix with a spatula this time (it will be easier than with the mixer).
3
Finish with the flour and mix with the stand mixer until you get a homogeneous dough ball. Don’t overwork the dough. Bring it together gently into a ball without insisting. Divide the dough into 2 equal portions.
4
Wrap each portion in cling film, shaping it into a flattened rectangle. Refrigerate overnight.
5
The next day, roll out the dough to a 3 mm thickness using a rolling pin. Cut out the number 1 using a template (I recommend the templates from the Planète Gâteau blog). Repeat to get a second number 1.
6
Refrigerate overnight (I personally put mine in the freezer). The remaining dough can be frozen for another dessert. It’s always very handy to have sweet pastry dough in stock in the freezer.
Baking the sweet pastry dough
Ingredients
- None
Method
1
Preheat the oven to 160°C / 325°F.
2
Place the 2 numbers on a baking tray lined with a Silpain mat. Note: to get the characteristic grid pattern from the Silpain mat, place the numbers upside down. The side that will be visible must be in contact with the mat.
3
Bake for 25 to 30 minutes, until the pastry is golden.
Assembling the number cake
Ingredients
- chocolate treats of all kinds (to taste)
- crunchy chocolate pearls
- chocolate discs with a birthday theme
Method
1
Place the first sweet pastry number on a serving board (it will be very difficult to move the cake afterwards).
2
Whip the milk chocolate ganache with a mixer until firm enough to pipe but not over-whipped. Transfer to a piping bag fitted with a 16 mm plain tip.
3
Pipe evenly spaced balls of whipped ganache all around the edge of the number. The interior can be filled less neatly — it won’t be visible.
4
Pipe hazelnut praline over the whipped ganache. Place the second sweet pastry number on top and press down very gently. Refrigerate for 20 minutes.
5
Pipe another layer of whipped ganache balls onto the second number, then decorate the cake with chocolate treats of your choice.
6
Keep refrigerated until serving (but remember to take the cake out about twenty minutes before eating so that the whipped ganache is not too firm). I filmed a video of the assembly of this number cake which I posted on Instagram. Feel free to watch it if it’s helpful.

Gallery