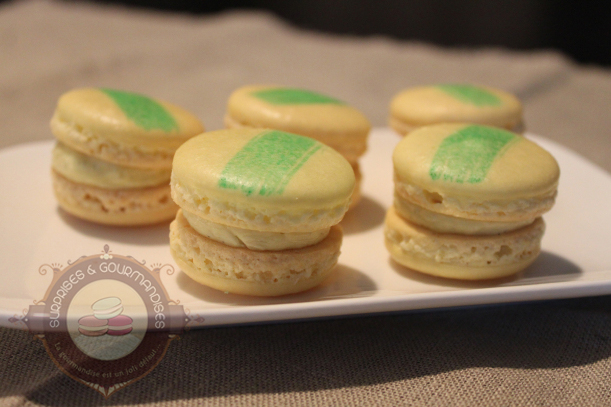
The day before the holidays, I felt like bringing a few sweet treats to school. I had plenty of shells left in the freezer, and after filling my macarons with a lemon ganache, I still had a few yellow shells left. A few days earlier, I’d seen that Tramier was running a competition: create a dessert recipe using olive oil. I immediately thought of a macaron, and after a little research I saw that Pierre Hermé had in fact developed an olive oil macaron recipe, adding vanilla to it. There it was, my dessert was decided.
A strange combination at first glance, isn’t it? Unlike Pierre Hermé’s recipe, I didn’t add pieces of olive on top of the ganache — the olive oil flavour came through enough on its own. Verdict? Very good, but the olive oil flavour overpowered the vanilla (I’d only used 1/4 of a vanilla pod, but I suggest you use 1/2 a pod instead). I was afraid of a “greasy” feeling in the mouth, but that wasn’t the case at all.
Ingredients & preparation
3 components · Full recipe
Shells
Ingredients
- 70 g (2.5 oz) egg whites
- 140 g (4.9 oz) icing sugar
- 80 g (2.8 oz) ground almonds
- 20 g (0.7 oz) caster sugar
- yellow food colouring
- green food colouring
Preparation
1
Blend the icing sugar and ground almonds together, then sift the mixture.
2
Beat the egg whites to stiff peaks, add the caster sugar in 2 additions and whisk at maximum speed to achieve the “bird’s beak” stage. Add a little yellow food colouring and mix again. I use powder colouring and add a knife tip’s worth.
3
Gradually fold in the almond and icing sugar mixture using a rubber spatula. The mixture should be glossy, smooth and fall in a ribbon. Once the right consistency is achieved, transfer to a piping bag fitted with a plain nozzle. Don’t hesitate to use a tall glass to support your piping bag — this way you can use both hands.
4
Pipe small domes of about 3.5 cm (1.4 in) in a staggered pattern on a sheet of parchment paper. For even macarons, I use a template downloaded from Pure Gourmandise. Leave to form a crust for about 20 minutes. If after an hour the surface of your macarons is still not dry, there’s a good chance they won’t form a crust at all. There can be several reasons for this — in any case, there’s no point waiting any longer. Bake the macarons anyway, but be prepared for the fact that they probably won’t have a foot.
5
Bake at 120°C / 250°F for 20–22 minutes. Once out of the oven, leave to cool before removing the shells. The shells are baked when they can be removed very easily.
Step by step
Not quite comfortable with macaron shells yet? I’ve put together two full step-by-step picture guides to help you get it right every time:
Vanilla and Olive Oil Ganache
Ingredients
- 75 g (2.6 oz) white chocolate
- 37 g (1.3 oz) full-fat liquid cream
- 1/2 vanilla pod
- 80 g (2.8 oz) olive oil
Preparation
1
Melt the white chocolate in a bain-marie.
2
In a small saucepan, heat the full-fat liquid cream with the 1/2 vanilla pod, split and scraped of its seeds.
3
Once the cream comes to the boil, remove the vanilla pod then pour the cream over the melted chocolate, stirring well to create a smooth, homogeneous mixture.
4
Drizzle in the olive oil at room temperature in a thin stream, blending with a hand blender until the ganache is smooth.
5
Transfer to a bowl and leave at room temperature until it begins to set.
Assembly
Ingredients
- None
Preparation
1
Sort your macarons so that the ones you pair together are the same size.
2
Mix a little green food colouring with water then, using a pastry brush, paint a stripe across half of the shells. Leave to dry.
3
Place a small amount of ganache in the centre of one macaron shell and sandwich two shells together.
4
Refrigerate and wait 24 to 48 hours before eating. The macarons should spend the first night in an unsealed container (to prevent them from becoming moist), then close the box and keep them in the fridge for a further 24 hours. They’ll only be better for it.

Gallery