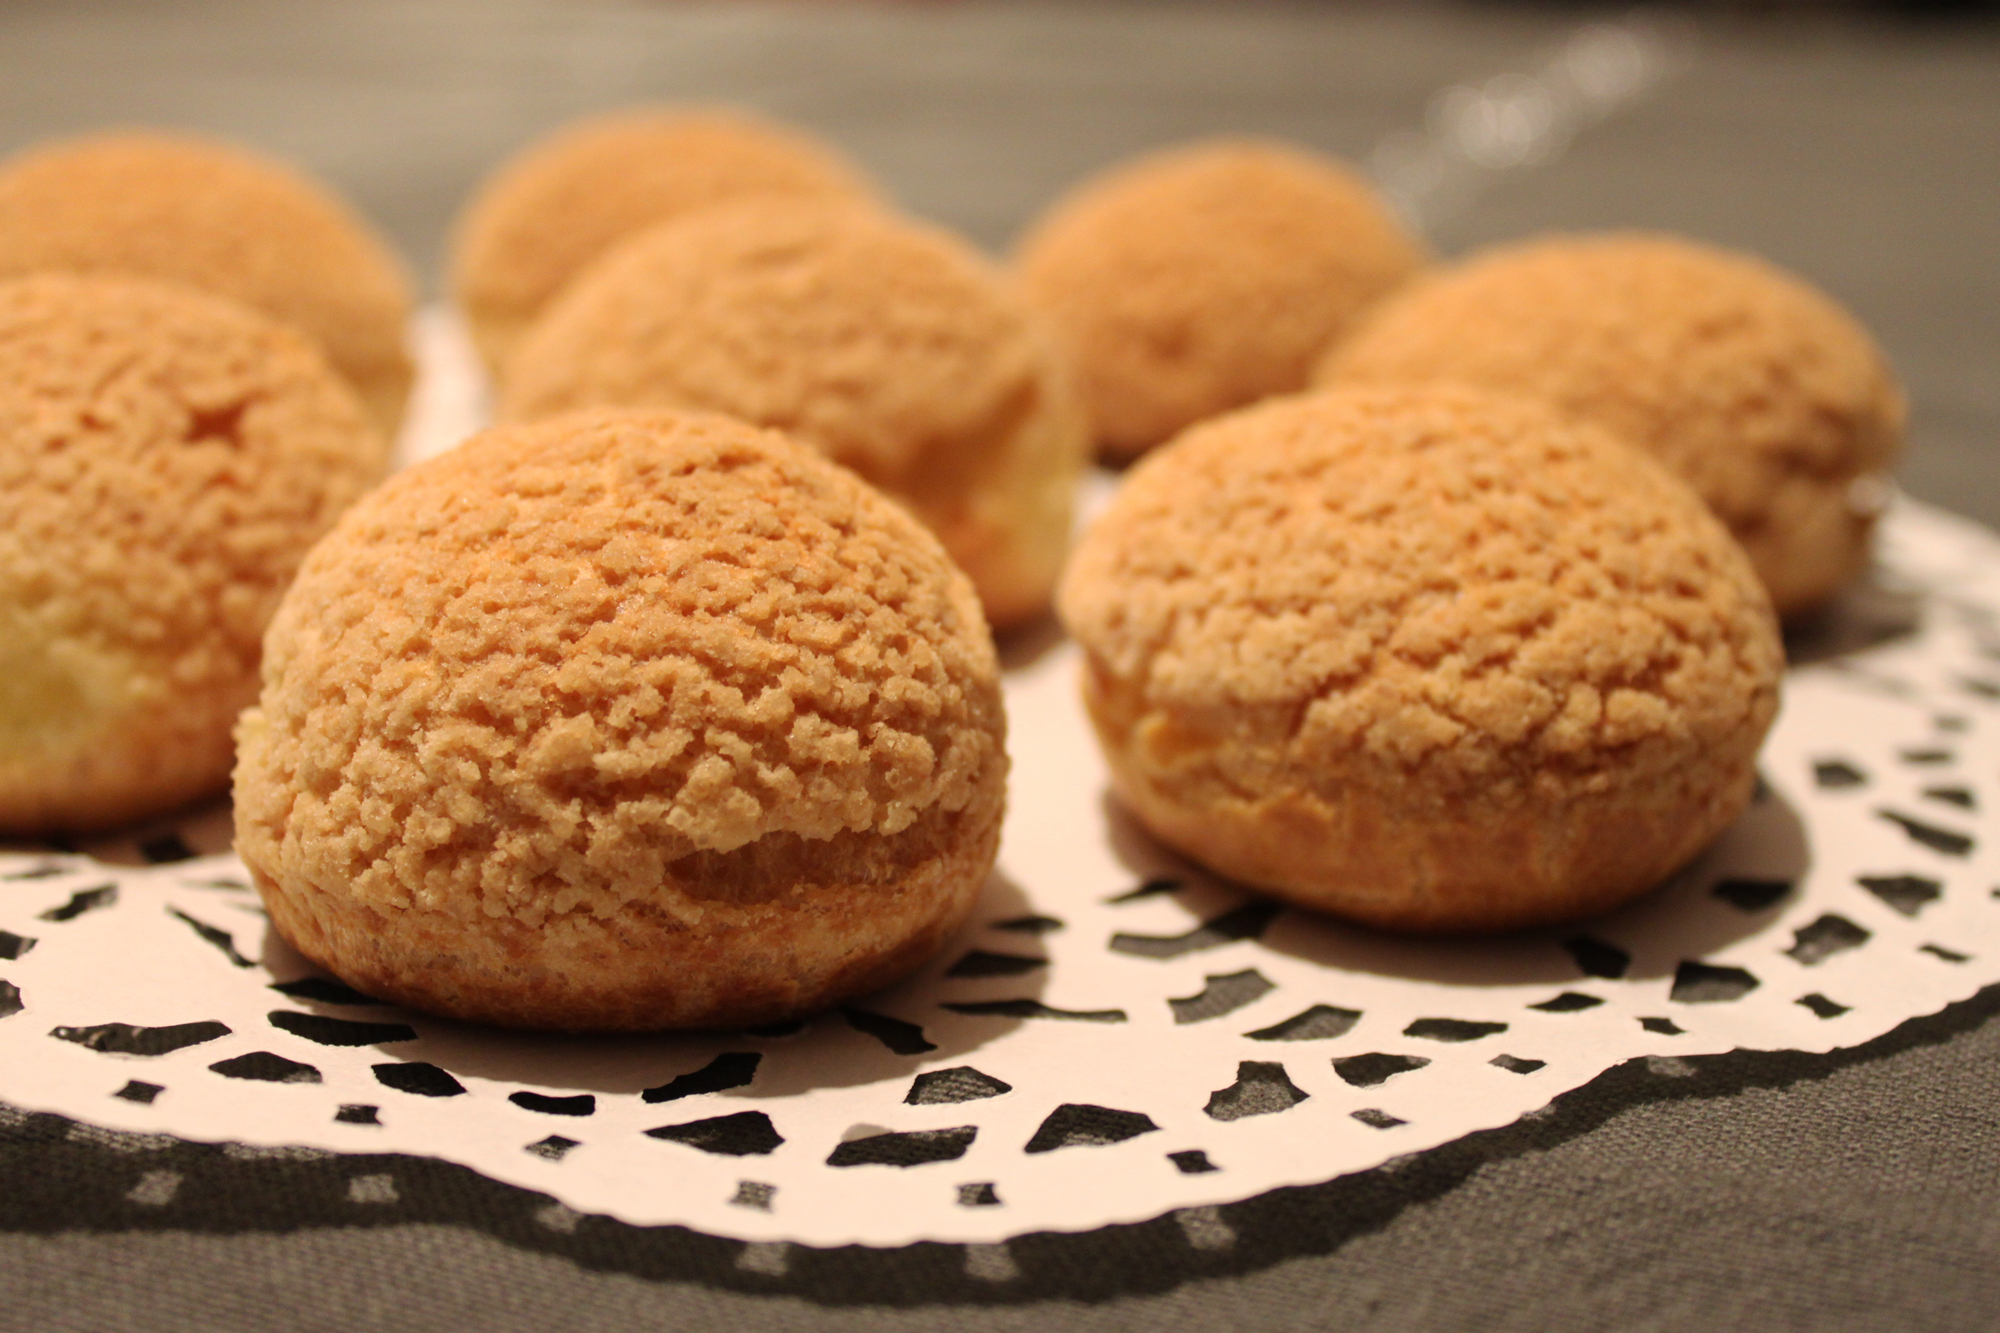
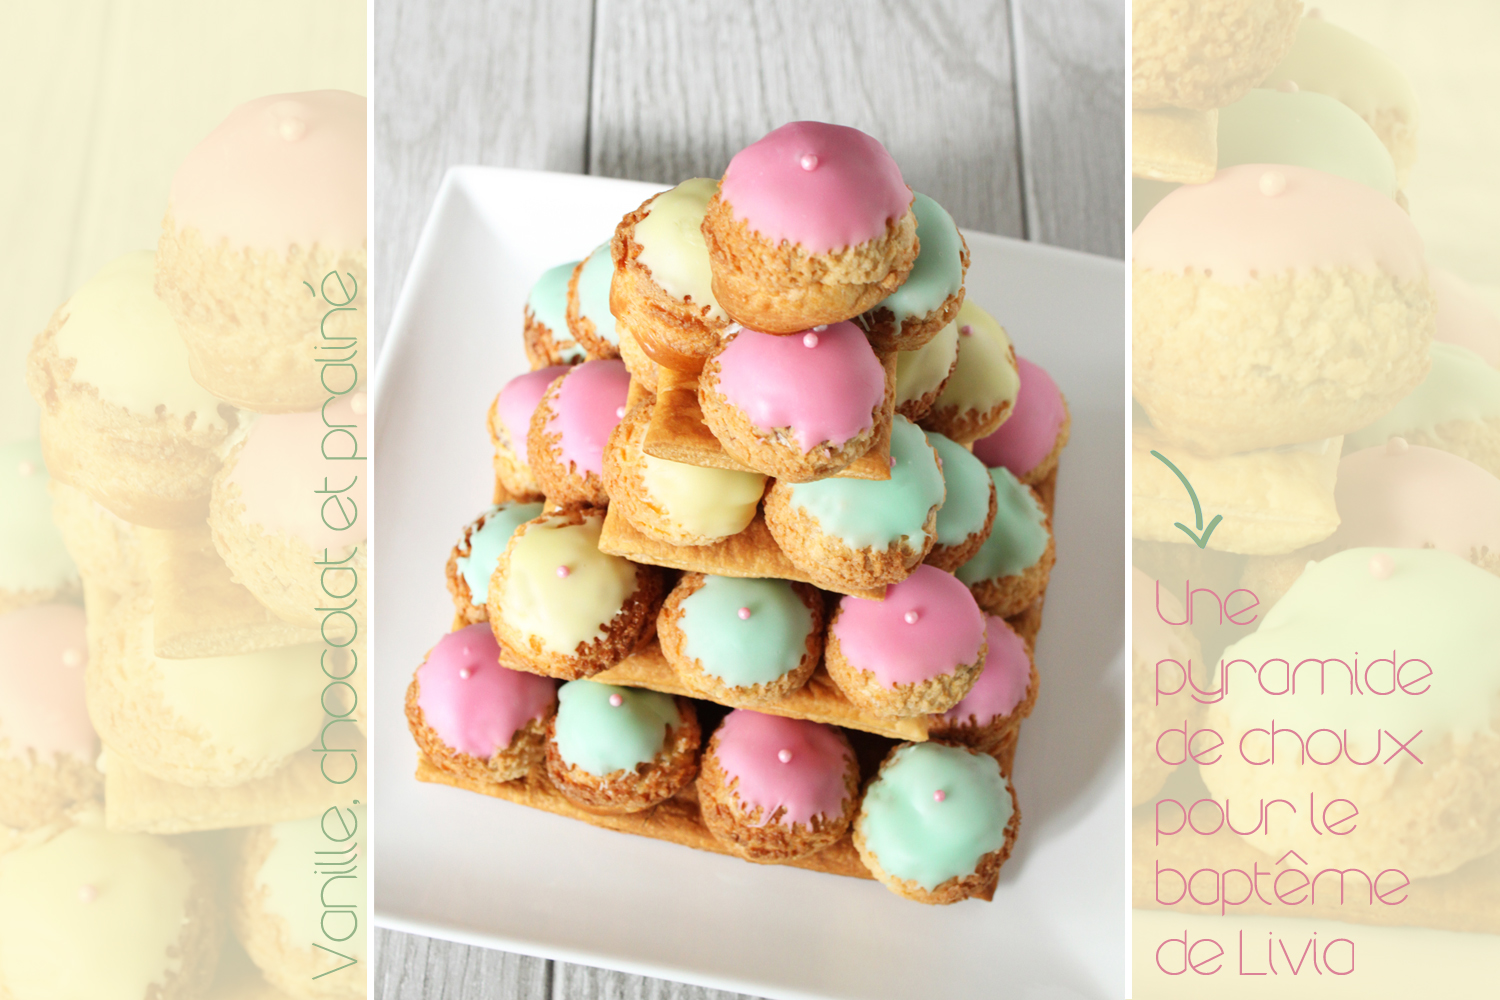
Here’s a project that was close to my heart: making 75 choux buns for the christening of a lovely little princess named Livia. Choux buns, I love them! But I still had a few worries in terms of organisation. I’m used to making choux buns, but when I fill them with cream and they spend the night in the fridge, they go soft and damp and lose their crunch (which comes from the craquelin). I was in a bit of a fix… soggy choux buns just aren’t as good! Especially since I had in mind the magnificent croquembouche by Sylvie from the blog Amuse-bouche.
In the end, Livia’s mum offered to come and collect the choux buns on Sunday morning (the day of the christening, that is). But as the church service was at 10:30, everything had to be ready by 9! I already knew that a (very) early wake-up call would be on the cards.
There’s no major difficulty (provided you’ve mastered choux pastry and pastry cream). What you need is to be or-ga-n-ised! So I made myself a schedule (which I’m sharing with you further down) so as not to be overwhelmed on the big day. The choux pastry was made days in advance and frozen in little balls, the day before I baked all the choux buns and prepared the 3 pastry creams (vanilla, chocolate and praline), and on the big day there was still quite a lot left to do. Luckily my other half was up for helping me at 7 in the morning because, looking back, I could never have made this croquembouche on my own (or else I’d have needed an extra hour).
What’s difficult when you make this many choux buns is working out the quantities needed to make them. On a website, I found the following information: “to work out how much cream to prepare, it is customary to multiply the amount of liquid in the choux pastry by 4. This gives approximately the quantity of milk needed to make the cream.” I preferred to make more choux buns (just in case…) and to go with 3 x 750 ml of milk for the creams. I had a little cream left over at the end but honestly, I’d rather that than have to whip up another pastry cream at top speed to fill 3 poor little choux buns!
Enough chit-chat (especially as I’ve gone into plenty of detail further down), let’s get down to business. I’m giving you the ingredients for 75 choux buns (a few more actually, but it also depends on the size of your choux buns), the utensils you’ll need, the countdown schedule, the step-by-step recipes and lots of tips so that you, too, can wow your guests 🙂
* * * * * * * The utensils * * * * * * *
To make the choux buns:
- disposable piping bags
- 2×2 sheets of baking parchment to roll out the craquelin
- 1 round cutter about 2-3 cm in diameter for the craquelin (I use the back of a plain nozzle)
- 1 plain nozzle about 10 mm in diameter to pipe the choux pastry
- 3 plain nozzles about 7-8 mm in diameter to fill the choux buns
- a half-sphere mould 2-3 cm in diameter
To make the creams:
- a saucepan
- a mixing bowl
- a whisk
- a spatula
- a large dish to transfer the cream into
- cling film to cover the surface
- a stand mixer or an electric hand mixer (to smooth the cream the next day)
* * * * * * * The organisation * * * * * *
Up to D-7
>> Prepare the choux pastry for freezing
It really does freeze very well. You may just need to add a few extra minutes of baking time.
This method really allowed me to lighten the workload for the weekend. I baked the choux pastry in 3 batches, so over 3 days (1 day = 100 g of milk and 100 g of water). I’ve given you the quantities for the whole lot above.
I use a half-sphere mould 2-3 cm in diameter (be careful, depending on the mould, the depth of the half-spheres can vary). I simply advise you to do a test run before the big occasion, to check that the amount of frozen dough suits you (and therefore that the final size of the choux bun suits you).
D-2
>> Prepare the craquelin for freezing too
You prepare the craquelin dough and divide it in 2 to roll it out properly (hence the 2×2 sheets of baking parchment). Once the dough is rolled out, cut out circles with the cutter of your choice and put them in the freezer (I leave the 2 sheets on).
D-1
>> Prepare and bake the choux buns
I use my oven on the fan setting, which lets me bake 2 trays at a time. For tips on baking, don’t hesitate to go and read my detailed article on choux pastry.
Once baked, all you need to do is leave the choux buns to dry on a wire rack in a dry place. I left them in the kitchen, on my worktop. I advise you not to stack them until they are thoroughly dry. It was the first time I’d made choux buns the day before and left them out in the open air. The next day, they weren’t damp at all.
>> Prepare the pastry creams
I chose to make the creams in 3 batches rather than make one plain cream to flavour afterwards. The quantities are pretty enormous, I think it would be impossible to make a single cream (imagine bringing 2.25 L of milk to the boil :O).
I advise you to transfer the creams into a large container (for slightly faster cooling) and to cover the surface with cling film to stop a skin forming (essential). The creams cool first at room temperature and then in the fridge. The next day, you’ll need to smooth them with a whisk or in the stand mixer.
>> Bake the puff pastry
I advise you to bake the puff pastry after baking the choux buns. That way, you’ll have the actual size of the choux buns to hand when preparing your squares of puff pastry. You’ll need to make several squares of different sizes: 4 choux buns wide, 3 choux buns wide, 2 choux buns wide and 1 big choux bun wide. Repeat a second time to make a second pyramid. There are always puff pastry offcuts left over. That’s what I used to make the 3rd mini pyramid.
The big day
I did this work with my man and thank goodness! It still took us a good 2 hours to smooth the pastry creams, put them in piping bags, finish baking the puff pastry, pierce the choux buns, fill the choux buns, glaze the choux buns and assemble the pyramid (and no breaks!). I quickly took a few photos but I would have liked an extra 15 minutes 😉
>> Prepare the 3 piping bags of pastry cream
Take one of the creams out of the fridge and smooth it in the stand mixer or with an electric hand mixer (thank you once again, my Kitchenaid!).
Put the cream in a piping bag fitted with a plain nozzle 7-8 mm in diameter, then set aside in the fridge. Wash the mixer bowl and the whisk and repeat with the 2nd cream, then the 3rd. The 3 bags of cream are now in the fridge waiting for the next step. Be careful not to overfill the bag as it becomes much harder to handle when full (I preferred to top up with cream…).
>> Fill the choux buns
Using a small paring knife, pierce the bottom of each choux bun by making a little cross.
Take the creams out of the fridge and off you go! The choux buns must be well filled (there’s nothing more frustrating than a half-full choux bun…). You need to squeeze the bag until the choux bun feels heavy and you can feel it swelling in your hand, or even hear a little cracking sound. Usually, the cream comes back out and you just scrape the excess cream off over a bowl. That said, ideally you stop just before (to avoid too much waste… well, I say that… personally, it’s never wasted ^^)
If, like me, you’re making several flavours of choux buns, don’t forget to keep the choux buns separate.
>> Glaze the choux buns
I chose 3 pastel colours to glaze the choux buns.
Heat some fondant icing in a bain-marie. When it becomes more liquid, add a tiny bit of gel food colouring (be careful not to add too much) and mix vigorously. The fondant must not exceed 35°C or you’ll end up with a dull fondant (easy if you have a thermometer). If you don’t have a thermometer, just dip your finger in (carefully, mind…), you shouldn’t feel any sensation of heat, otherwise you’ve gone past 35°C. I also added a few drops of water to my fondant because I found it too thick.
For the actual glazing, I dipped each choux bun into the bain-marie bowl. Remember to smooth the fondant with your finger for a neat glaze (it’s not always easy with a choux bun covered in craquelin). A little tip: keep a piece of damp kitchen paper nearby to get rid of the excess fondant.
Then stick a sugar pearl on the bottom of the choux bun. You need to do this as you go along, otherwise the fondant sets and the pearl won’t stick.
>> Make the royal icing
I didn’t want caramel, to avoid a disaster if the choux buns went in the fridge (and I knew they’d be going in the fridge). I preferred to make royal icing, for the first time. I’m no expert but I think it worked out fairly well. The idea is to make a mixture of icing sugar and egg and to mix until you get the desired consistency (adding more or less sugar or egg white as needed…).
>> Assemble the choux pyramid
Ideally, all the choux buns should be glazed. For me, that wasn’t the case (my man was still glazing while I started assembling the pyramid). So, for lack of time, I had to start with 2 colours instead of 3.
At home, I only assembled 2 tiers each time to avoid breakages (the choux buns had to travel by car…). So it was Livia’s mum who took care of finishing the assembly at her place 🙂
* * * * * * * * * The recipe * * * * * * * * *
Ingredients & method
9 components · Full recipe
Choux Pastry
Ingredients
- 300 g (10.6 oz) water
- 300 g (10.6 oz) milk
- 6 g (0.2 oz) sugar
- 6 g (0.2 oz) salt
- 240 g (8.5 oz) butter
- 360 g (12.7 oz) flour
- 600 g (21.2 oz) eggs
Method
1
In a saucepan, combine the water, milk, salt, sugar and butter. Bring to the boil, then remove from the heat and add the flour all at once. Stir well with a wooden spoon.
2
Return to the heat for 30 seconds to dry out the panade (it should just start to catch on the bottom of the pan).
3
Remove from the heat and transfer to a bowl. Leave to cool for a few minutes.
4
Whisk the eggs and add them to the dough gradually. The dough should be neither too thick nor too runny — it should fall in a ribbon (if using an electric hand mixer, use the dough hooks rather than the whisk attachments; if using a stand mixer, use the paddle).
5
Using a piping bag, fill the half-sphere silicone mould (2–3 cm (1.2 in)) with choux pastry. Smooth the surface and place in the freezer. I did this over several days to build up the right quantity of puffs.
6
The day before, preheat your oven to 230°C / 450°F fan-assisted.
7
Remove the frozen choux pastry balls from the freezer and arrange them in a staggered pattern on a baking paper-lined tray, leaving space between each puff. Prepare a second identical tray.
8
Place a frozen craquelin disc on top of each puff.
9
Before placing in the oven, reduce the temperature to 180°C / 350°F and bake both trays for approximately 25 minutes.
10
After baking, transfer the puffs to a wire rack and leave to cool. Leave out in the open overnight.
Craquelin
Ingredients
- 120 g (4.2 oz) unsalted butter
- 150 g (5.3 oz) light brown sugar
- 150 g (5.3 oz) flour
- 3 pinches of fleur de sel
Method
1
In a bowl, mix the flour, brown sugar and fleur de sel, then add the softened butter and knead by hand for a few minutes until a smooth, homogeneous dough forms.
2
Roll the dough out to 3 mm thick between two sheets of baking paper.
3
Cut out discs to match the diameter of your choux (slightly larger if you want the craquelin to cover the puff completely, or slightly smaller if you want it to reach only halfway up. You can use a cutter, the back of a piping nozzle, etc.)
4
Set aside in the freezer.
Vanilla Pastry Cream
Ingredients
- 750 ml (25.4 fl oz) milk
- 120 g (4.2 oz) egg yolks (4 to 5 eggs depending on size)
- 185 g (6.5 oz) sugar
- 75 g (2.6 oz) cornstarch
- 112 g (4 oz) butter
- 2 or 3 vanilla pods
- 1/2 gelatine sheet
Method
1
Soak the half gelatine sheet in very cold water.
2
In a bowl, whisk together the egg yolks and sugar until the mixture turns pale.
3
Add the cornstarch and mix well.
4
Bring the milk to the boil in a large saucepan with the split and scraped vanilla pods. Pour a little of the hot milk in a thin stream into the bowl, whisking constantly to loosen the cream, then pour everything back into the saucepan with the remaining hot milk.
5
Whisk over medium heat until the cream thickens.
6
Transfer to a bowl, add the drained gelatine and the butter cut into pieces. Whisk vigorously until the butter has melted in.
7
Pour the cream into a large dish, then cover with plastic wrap directly on the surface. Leave to cool at room temperature first, then refrigerate overnight.
Chocolate Pastry Cream
Ingredients
- 750 ml (25.4 fl oz) milk
- 120 g (4.2 oz) egg yolks (4 to 5 eggs depending on size)
- 185 g (6.5 oz) sugar
- 75 g (2.6 oz) cornstarch
- 200 g (7.1 oz) dark chocolate
- 100 g (3.5 oz) milk chocolate
- 1/2 gelatine sheet
Method
1
Soak the half gelatine sheet in very cold water.
2
Chop the chocolate and place it in a bowl.
3
In a separate bowl, whisk together the egg yolks and sugar until the mixture turns pale.
4
Add the cornstarch and mix well.
5
Bring the milk to the boil in a large saucepan. Pour a little of the hot milk in a thin stream into the bowl, whisking constantly to loosen the cream, then pour everything back into the saucepan with the remaining hot milk.
6
Whisk over medium heat until the cream thickens.
7
Pour over the chopped chocolate and add the drained gelatine. Whisk vigorously until the chocolate has melted in.
8
Pour the cream into a large dish, then cover with plastic wrap directly on the surface. Leave to cool at room temperature first, then refrigerate overnight.
Praline Pastry Cream
Ingredients
- 750 ml (25.4 fl oz) milk
- 120 g (4.2 oz) egg yolks (4 to 5 eggs depending on size)
- 60 g (2.1 oz) sugar
- 75 g (2.6 oz) cornstarch
- 1/2 vanilla pod
- 280 g (9.9 oz) praline paste
- 1/2 gelatine sheet
Method
1
Soak the half gelatine sheet in very cold water.
2
In a bowl, whisk together the egg yolks and sugar until the mixture turns pale.
3
Add the cornstarch and mix well.
4
Bring the milk to the boil in a large saucepan. Pour a little of the hot milk in a thin stream into the bowl, whisking constantly to loosen the cream, then pour everything back into the saucepan with the remaining hot milk.
5
Whisk over medium heat until the cream thickens.
6
Transfer to a bowl, add the drained gelatine and then the praline paste. Whisk vigorously until the praline is fully incorporated.
7
Pour the cream into a large dish, then cover with plastic wrap directly on the surface. Leave to cool at room temperature first, then refrigerate overnight.
Puff Pastry Sheets
Ingredients
- None
Method
1
Preheat the oven to 180°C / 350°F.
2
Unroll a sheet of puff pastry and arrange 16 choux in a square shape to mark the size of the pastry square needed.
3
Cut the pastry with a large knife, prick it all over with a fork, then dust both sides with a little sugar (I skipped this step).
4
Place the pastry on a baking paper-lined tray. Cover with another sheet of baking paper and another tray on top (to prevent the pastry from rising too much).
5
Bake for approximately 20 minutes (until a lovely golden colour) then leave to cool on a wire rack.
6
Repeat to make a second large square of pastry.
7
Repeat the same process for the other sizes of puff pastry sheet (2 squares with 9 puffs, 2 squares with 4 puffs, 2 squares with 3 puffs arranged in a triangle).
Filling the Choux
Ingredients
- None
Method
1
Smooth all 3 pastry creams and transfer each one into a piping bag fitted with a 7–8 mm nozzle. Set aside in the fridge until needed.
2
Pierce the base of each puff with a small paring knife (just make a small cross).
3
Fill 25 puffs with vanilla pastry cream, 25 with chocolate pastry cream and 25 with praline pastry cream. Keep the flavours separate!
Glazing the Choux
Ingredients
- 600 g (21.2 oz) fondant icing
- gel food colouring (pink, yellow, green)
- sugar pearls
Method
1
Warm the fondant icing to a working temperature of 33°C / 91°F in a double boiler (35°C / 95°F maximum). Colour the fondant as desired.
2
It is important not to overheat the fondant, as it will dry out: the glaze will lose its shine and may crack.
3
Glaze the top of each puff, smoothing the tip to the side with your finger.
4
Stick a sugar pearl on before the fondant sets.
Pyramid Assembly
Ingredients
- 3 puff pastry sheets
- royal icing (a mixture of icing sugar and egg white)
Method
1
First, make the royal icing with icing sugar and egg white. Adjust the quantities to reach the desired consistency. Transfer to a piping bag and snip the tip with scissors.
2
Time to build the pyramid! This is the most fun part (such a shame it was a mad rush!). Simply glue the puffs onto the various puff pastry bases using a little royal icing, alternating the colours for a more attractive result. Be careful — puff pastry is fragile!
3
And there you have it! Time to admire all that hard work! ^^ The guests apparently loved it, Livia’s mum was delighted, and little Livia even ate 3 puffs 🙂
4
The step-by-step choux pastry process is shown in my previous article: choux pastry (step by step in pictures)

Gallery